
Traditionally black tends to struggle in higher powered cubes and I think this is because black doesn’t have as many of the broken single card enablers. In my cube, however, I have removed those from my cube and black has a chance to shine. And oh my does it ever — black has so much going on in this cube! Zombies, Discard, Sacrifice, Combo Sacrifice, and Storm.


Zombies
The premiere “Mono Black” archetype in this cube is Zombies. This wasn’t originally an intentional choice, but as I was building the cube many of the good black enablers just happened to be zombies. So I added a couple extra payoffs for Zombies and now it is an entire archetype! As with most aspects of this cube, the specifics of the Zombies archetype is likely not what you would expect, so it’s worth explaining in some detail.


Gravecrawler is THE zombies card. It is difficult to overstate how strong this card is in the cube. With so many different payoffs for sacrifice, ways to mill yourself and combo off, this little guy does it all. I take him going late as a sign that Zombies is open and move in. He goes infinite with Phyrexian Altar and Pitiless Plunderer
 , represents a crazy amount of cards with Skullclamp
 or Undead Augur
 or Midnight Reaper
 and just overall good value with stuff like Altar of Dementia
 . (With Altar specifically, you can use it to mill into your Gravecrawler and other combo pieces).
Next up is Cryptbreaker . If Gravecrawler is the big payoff of Zombies, Cryptbreaker is the enabler. It draws a ton of cards, creates an army and is a serviceable discard outlet as well. There is a strange tension with when you should play this card. Casting it early is great for utilizing the discard ability, but you also may want to keep it in hand to protect it until you can draw cards immediately when it comes down.
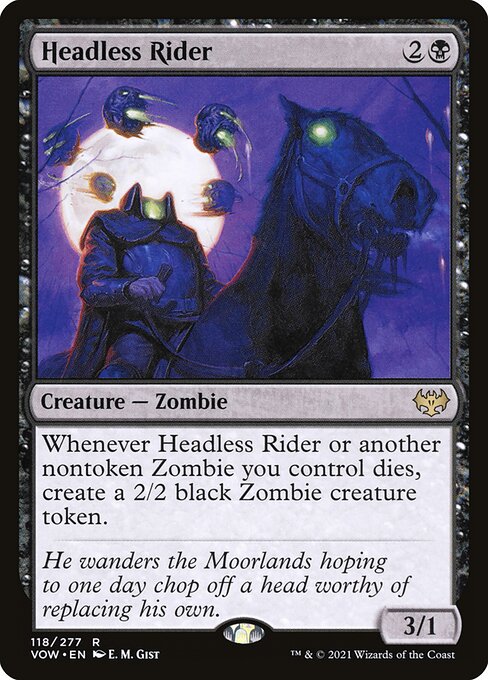
Headless Rider is another fantastic enabler for this deck, as it makes all of your non-token Zombies die into more zombies! There are so many ways to go deep with this card, many of them involving the powerful sacrifice outlets in the cube like Yawgmoth, Thran Physician
 , Phyrexian Altar or Goblin Bombardment
 .
.
The last of the Zombie tribal cards is Undead Augur, which is just a cheaper Midnight Reaper but specific to Zombies.
And that’s it! There are no Zombie lords or beatdown plans. While Zombies only have a few “tribal” payoffs, the real strength to the deck comes from the fact that you essentially get these tribal payoffs for free, as most of the cards you would want to be playing are Zombies anyway. So when I refer to the “Zombies” deck, know that I am primarily referring to the overall gameplan and only secondarily the creature type. It is like how artifact decks can be called “affinity” even if they don’t have any affinity cards in them.
The Game Plan


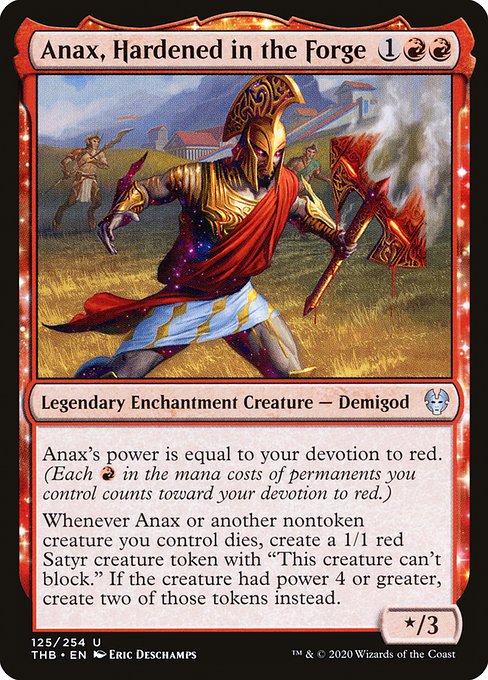
The Zombies deck plays at the intersection of most of what black is trying to do: Discard, Sacrifice and Dredge. It feels very thematic to play. Within the deck you can lean into whatever strategies seem to be open to you. The crazy thing is even within one color pairing there is so much flexibility. For example you can play BR zombies by leaning into sacrifice with Mayhem Devil and Anax, Hardened in the Forge
 or discard with Bazaar of Baghdad
 , Bridge From Below
 and Anger
 . There are even cards that combine both discard and sacrifice like Rotting Rats
 , Nether Traitor
 and Scourge of Nel Toth
 .
.

If you are heading into sacrifice Zombies, your game plan will often involve some sort of non-infinite combos. Things like Headless Rider + Nether Traitor with Carrion Feeder and Blood Artist
 can do a lot of work against your opponent’s life total. Of course, infinite combos are also possible but I would say that most of the time you will just end up with this big pile of stuff that keeps getting bigger the more it dies until it consumes your opponent.
In this build, you’ll want to prioritize good sacrifice outlets and recurrent threats. Yawgmoth, Thran Physician is an excellent top-end card allowing you to fill your hand while clearing the opponent’s board. He is also a discard outlet, even if that mode rarely gets used. Relentless Dead is a great pickup for the lategame as it can bring itself back along with any of the key enablers you may have milled or lost earlier in the game. It pairs best with versions of the deck with excess mana from Phyrexian Altar or Pitiless Plunderer. A shell like this is set up to go infinite very easily with either Gravecrawler
 or Nether Traitor

The discard version of the deck plays more like a reanimator/dredge deck with cards like Stitcher's Supplier hoping to mill into cards like Hogaak, Arisen Necropolis
 , Bridge From Below and Scourge of Nel Toth. You can also just discard these cards using something like Putrid Imp
 or the blood tokens from Voldaren Bloodcaster
 .
.
In this archetype, you absolutely need to prioritize discard outlets since they will be key for setting up your deck. Cards like Bridge From Below aren’t so great when they’re stuck in your hand. You may have to get creative with your discard outlets, keeping in mind that stuff like Cabal Therapy and Raven's Crime
 can be cast on yourself if needed.
Red is also a good color pairing for the really discard heavy builds, as it offers great discard options and payoffs like Ox of Agonas , Faithless Looting
 and Anje's Ravager
 .
.
Misc. Role Players


This deck really benefits from the abundance of interactive and disruptive cards available to it. I cannot overstate just how impactful even a single discard spell can be in some games. I brought up Divest specifically in this example because I think it is one of the most underrated of the discard options. It hits 287 out of the 448 nonland cards in this cube (as of the time of writing this), most of those being win conditions and combo pieces.
Unless you get fast mana and every combo piece with some tutors, this deck wants to trade resources with the opponent. Being largely centered on black you can load up on the best interaction in the entire cube and grind your opponent to dust. Cards like Miasmic Mummy might look innocuous, but they allow you to advance this disruptive gameplan while also being an enabler and body on your side. These small hindrances like discarding a card or sacrificing a creature really begin to add up to something meaningful.
Cabal Therapy might look like a meme in cube, but it actually has a lot of utility. First, if you can pair it with any other way to look at your opponent’s hand before using this it acts as a double Thoughtseize. Second, it is a great card to mill into or discard since it gives you both sacrifice and discard outlets from your graveyard (remember, you can target yourself).

The zombie decks can struggle a little bit if they don’t get some form of acceleration. With all of the fetchlands in the cube, Deathrite Shaman is all of that and more. It’s not wonder this card was banned in legacy. It offers graveyard hate, ramp, life gain and a very respectable clock. I take this card very highly in my black decks (and green ones too).

While it may only look like a decent removal spell, the Dredge 3 makes Darkblast a great utility piece. It is entirely possible to put this card into a deck that has no intention of ever casting it, and that’s what makes it so fun! Darkblast + Bazaar of Baghdad can fill your graveyard in a hurry. It also kills ~47% of the creatures in the cube, which is nothing to scoff at either!
Life From the Loam should be mentioned for a similar reason. You can use it to dredge just like Darkblast, but it also can be used to fill up your hand and help you find or re-buy your Bazaar.
Discard
There is already an extensive discussion of discard in my post discussing the red archetypes in my cube (plus the discussion above). The few things I do want to add here is that the black discard deck differs from the red discard deck in that the black deck is often lighter on discard and only wants to get a few key cards into the graveyard, namely Bridge from Below, Vengevine and Scourge of Nel Toth.

So in black, you don’t really need repeatable discard as much as you need one or two instances of discard throughout the game (although you’ll likely need more than that in your deck, for consistency). For that reason I would say discard is more of a sub-theme than an entire archetype. You want to look for incidental discard wherever possible. Cards like Rotting Rats are perfect for this role since they give you an out to discard one of your key payoffs but they are generally useful/disruptive even when you don’t have something you want to put in the graveyard.
Since red and black discard has already been talked about, I’ll showcase a few blue cards for the archetype.

Fatestitcher is a zombie that loves to be discarded. While mainly for helping with Jeskai Ascendancy , it is serviceable in other decks as well. Notably, you can use it to untap Bazaar of Baghdad and Priest of Forgotten Gods
 for extra activations. I wouldn’t say it is a high priority pickup, but I would probably run it in most decks that run Bazaar and have access to blue mana.

In most archetypes, Master of Death is just discard fodder. But in UB zombies it is actually a fairly decent card to cast. Surveil 2 gives you card selection and can put some key cards into the graveyard. Plus, it keeps coming back no matter how many times it dies!


Flashback Spells like Lingering Souls, Echo of Eons and Deep Analysis are often better when discarded, as they get significantly cheaper. And remember, when casting a card from your graveyard you don’t need to spend a card on it like you do when casting something from your hand (because presumably you got some value when discarding it, or you milled into it). So casting a “free” Deep Analysis from your graveyard is actually as much card advantage as Ancestral Recall . This doesn’t apply when you discarded the cards exclusively to make casting them easier though, since they really came from your hand to begin with.


Because the black discard deck is really more focused with getting cards into the graveyard than it is specifically discarding stuff (like red madness might be), cards that mill you are excellent in this deck as well. Rather than having to lose a card in hand to get your Bloodghast into your graveyard, you can just put it there from your library. In the right deck with a bit of luck, milling yourself for three can be worth 2+ cards of value. Other examples of great things to mill are Ox of Agonas and Gravecrawler.
Sacrifice
Sacrifice might be the most “standard” archetype in my cube. I have already written about the standard versions to some length in my red article, which you can read here (since sacrifice tends to focus around BR). That being said, there are lot of interesting things you can do in black that I hadn’t mentioned before.
The basics of the sacrifice deck is combining cards that sacrifice things for value with stuff that wants to be sacrificed. Phyrexian Altar and Shambling Ghast are a good example of this. Now you can either make mana and kill an opposing creature or create a Treasure token.


The most important thing to look for when drafting this deck are the sacrifice outlets. You can have all the setup in the world, but without some way to sacrifice creatures the deck will not function. A dedicated sacrifice deck is going to want at a minimum 2-3 reliable sacrifice outlets. If you are loaded up with tutors and discard to protect your outlets, 2 might be ok. But 3+ is where you should aim. The good sacrifice outlets like Altar of Dementia and Goblin Bombardment are at a premium, since they provide additional value beyond just letting you kill your own creatures.
Once you have a sacrifice outlet, you’ll need to load up on things to sacrifice. Fortunately this cube makes it fairly easy for you, as most of the creatures are cheap and don’t mind hitting the graveyard. The biggest error I see with this aspect of the deck is filling up your deck with too much expensive sacrifice fodder— you generally want stuff in play before your Phyrexian Altar hits play. Ophiomancer , Anax, Hardened in the Forge and Headless Rider are all great cards, but you need cheaper things so you can build up a board state quickly, otherwise you are very weak to disruption.
Combo Sacrifice
With the basics out of the way, let’s get to one of my pet archetypes in this cube. I would call it gravestorm but that archetype is already taken so I’ll just refer to it as “Combo Sacrifice”. Unlike with regular sacrifice decks which are just trying to accumulate value over time, the goal here is to go as big as possible with your sacrifice deck and “storm off”.
Mana


First, your deck is going to need mana so it can get going. Phyrexian Altar is probably the best possible card for this, and finding one early is often the reason I go into this archetype. Pitiless Plunderer is next and pairs well with the Phyrexian Altar, allowing you to really go big with your mana. Keep in mind that both Altar and Plunderer work on token creatures. Earthcraft can also be phenomenal in this archetype as it allows you to get mana from creatures pro-actively. By that I mean you can cast Earthcraft and use your creatures to accelerate out your other enablers faster. Then sacrifice them for value. It also generates mana just fine when going off too. (Just remember, you will need basic lands). Gaea's Cradle can actually have some utility in these decks too, if you are heavy enough on the tokens.

Speaking of mana and creatures, the mana creatures are fantastic in this archetype. They accelerate you and provide bodies to sacrifice later on. I often end up with a solid amount of dorks in this build, as casting your payoffs earlier can mean everything.
Tokens for Days


Remember how I said above that our key enablers worked with tokens? Well these are some phenomenal token producers. It seems to surprise people but Pest Infestation doesn’t need any targets in order to be cast, and it effectively plays like GX: create X tokens (with tons of upside). Out of the three, Empty allows you to go the biggest but I would run all of these if I had the opportunity to.

Chatterfang is worth mentioning for a few reasons. First, it lets you go even bigger by doubling all of your token production. Chatterfang into Empty the Warrens can create an absolutely crazy number of tokens. Second, Chatterfang gives you a sacrifice outlet and removal for free. I’m always high on combo pieces that can also be disruptive, and this fits that theme perfectly.
Lastly, Chatterfang is an infinite combo with Pitiless Plunderer, which is a card this deck already wants to be running. Whenever a squirrel dies, you make a Treasure. Then whenever you make a treasure, you also make a squirrel. The result is squirrels that infinitely come back and infinite mana, so you can machine gun down your opponent’s entire board and then win however you see fit.

Genesis chamber is a risky card, but the payoff can be incredible. With any of the good mana production engines mentioned above and some recursive nontoken creatures (I discuss some of them below) this card can absolutely go off.
Aside from the big proactive token makers, there are also a few cards that reactively make tokens. These can be great for setting up combo loops where you sacrifice something like Gravecrawler to create a Zombie token, a Satyr and 2 Squirrels. I’m sure you can imagine how that could get out of hand quickly. Especially with the mana engines above like Phyrexian Altar.


Recursive creatures like this also fit into this archetype. Gravecrawler and Nether Traitor are the best of the two as they both go infinite with just about anything. (Nether Traitor in particular likes the “token on death” cards, since its ability works for tokens too). Rather than going wide with storm, you can just loop these creatures for your combos as well. Surprisingly enough, Aluren can be useful in some versions of these decks, as well as Enduring Renewal
 .
.
Card Draw
So we have our mana engines and our token creation, lastly we’re going to need to draw some cards. It shouldn’t surprise you that Skullclamp is everything you want for this deck, being able to draw a few cards early and your entire deck once you get going. Skullclamp is broken and you should take this card highly (in almost any archetype in this cube, but especially sacrifice/tokens).


Aside from clamp, there are quite a few “when creature dies, draw” effects like Fecundity and the Standard Bearer. Make sure you read your cards carefully when though, some work with tokens and some don’t! (These three all do, as well as Undead Augur but Midnight Reaper does not). Yawgmoth is great in this role because he also works proactively as removal, sacrifice and he can even serve as a discard outlet for something like Bridge from Below. Just be sure not to kill your opponent’s creatures if that is your plan for him!
The trick to the Standard bearer is to hold out for as long as possible so you can maximize the cards drawn. Be careful not to deck yourself though as the trigger is not a may ability. Recurring this card can lead to some crazy games, so keep your eyes open to lines involving Relentless Dead, Eternal Witness and Undead Butler
 bringing back the Standard Bearer. As well as Rally the Ancestors
 and Brought Back
 .
.
For any who have played Zubera storm you may already know the trick, but you can stack the Standard Bearer’s Enter the battlefield trigger and sacrifice it in response before bringing it back with something like Undead Butler or Relentless Dead and sacrificing it (and any other creatures you returned) again. The original card draw trigger and the second trigger will then both resolve, and you will gain all of the additional draws from the additional sacrifices with your first draw trigger. This can really let you stretch this card for an enormous amount of value.


This archetype benefits greatly from tutors, and is in the perfect colors for them! The draws can get a bit wild since the order of your payoffs can be fairly important, so tutoring up what you need when you need it is awesome. This is quite possibly the best Diabolic Intent archetype too.
Winning the Game
Usually I have to write more for this section, but winning the game in these decks is pretty easy. Swing with a million tokens, find a single Blood Artist or Goblin Bombardment or get creative with it.
Misc. Discussion

It can be tempting to want to run Yawgmoth’s Will in this archetype, but be wary that the exile effect replaces all of your death triggers, so you won’t be able to win with Blood Artist or anything like that. I think this card still does have a place, especially in the token storm heavy Empty the Warrens![]() versions of this deck. Just keep in mind not to exile all your win conditions. Winning on your opponent’s upkeep is a fairly easy workaround for this.
versions of this deck. Just keep in mind not to exile all your win conditions. Winning on your opponent’s upkeep is a fairly easy workaround for this.


Unlike Yawgmoth's Will , Underworld Breach does not interfere with death triggers and is perfectly serviceable in decks like this. You can use it to cast your Chatterstorm
 multiple times, or assemble the above combo with a sacrifice outlet to mill your entire deck and create lots of mana. (The Supplier mills 6 cards from ETB + death, which is what you need to pay the escape cost for LED and supplier. You only need to cast LED 1/3 times so you can use the other milled cards to cast other things.) Combine this with Pitiless Plunderer and you don’t even need LED at all. Undead Butler can work for this too, but to a lesser extent.
Storm


Strange that I would consider storm one of the more obvious archetypes in this cube but here we are. This archetype is fairly standard compared to most other vintage cubes so I don’t think it deserves too much of a deep explanation (I have lots of videos of me playing this deck on my YouTube channel). You cast some rituals or LED to build up your storm count, then bring them all back with Yawgmoth’s will or Past in Flames
 .
.
The major difference for storm in this cube compared to a regular vintage cube is that you have a lot more directions to pivot into. Token storm, Glimpse of Nature combos, KCI
 loops, etc.
All I really want to get across in this section is to encourage you to not get stuck thinking about storm as specifically LED + Yawg Will + Tendrils. Maybe you mill yourself using Stitcher's Supplier to power up Underworld Breach or you run Yawgmoth's Will + Phyrexian Altar as a way to sacrifice your elves and then re-cast them with an active Glimpse of Nature (just make sure to cast Will after you sacrifice things).
There are so many ways to storm off. While traditional storm is one way, I encourage you to get creative and improvise. I’m not saying to intentionally turn it down when the dream LED Yawg Will Tendrils deck falls in your lap, but just stay flexible and open. Your decks will end up better and you will have more fun playing a larger variety of decks in the instances when everything doesn’t perfectly come together for the one specific build of storm most people are accustomed to.
Conclusion
Black has a lot going on. In addition to all the things I mentioned above, discard + removal is what really makes this color work. Being able to interact with the board and hand is difficult for many decks to handle, and the amount of time you lose when you spend a spell and some mana to disrupt your opponent you will often gain back in the time you gain by slowing them down.
While there are a ton of different archetypes you can play, there is a limited pool of disruptive spells in the cube. If you are in the deck that wants Scourge of Nel Toth, there’s a pretty good chance nobody else will be able to make use of it. This is true for many of the more narrow synergistic cards. If you take things like Thoughtseize first, the synergy cards are more likely to come around than if you draft them in the other order. The first discard and removal spell do a lot for your deck, and you’ll usually want at least two of each.
This is all meta dependent of course. One famous problem in Economics is that people do not always act in a way that maximizes their own benefit which makes them hard to predict. We all do dumb stuff, and especially in a card game sometimes people just want to have fun. So if you are drafting this cube in an environment where people speculatively take narrow synergy cards early and pass removal late, you may have to take the synergy whenever you can get it.